Right now, a ton of squiggly, bright designs are in for manis. While I always see those designs and wonder realistically how many nail salons can actually do them (and how much do they charge?!), I also acknowledge they wouldn’t be a walk in the park to do at home either- particularly on your non-dominant hand. So how do you get the trendy, pretty mani? Well, I pulled out one of my old middle school tricks… the water marble, to see if I could recreate the look myself.
Water marbling is excellent because without much effort of your own, it very easily does something that would be near impossible to create otherwise. The basic idea is that you drop polish onto water, it spreads out, you create a design, and upon dipping your nail in the water it transfers into a smooth and gorgeous swirly canvas.
If you’re interested in learning the few easy steps that will make you seem like a certified nail pro, keep reading. Or, if you’d prefer to watch, I’ll walk you through in the video below. ☺️
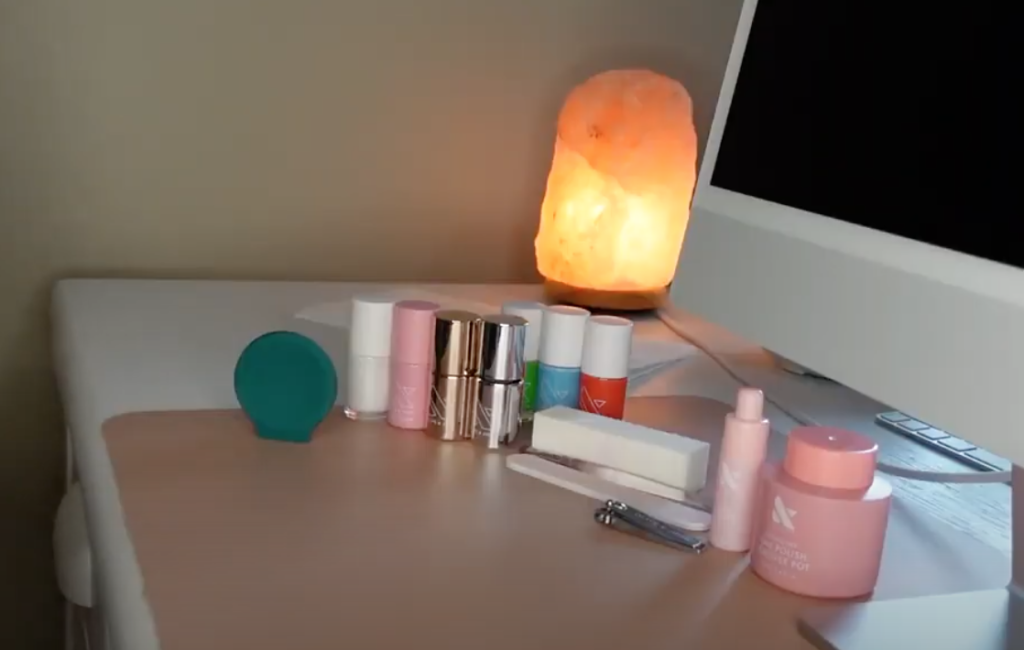
Water marbling requires more supplies than a typical mani. Below is all that you will need to be successful.
What You Will Need
- Olive & June Mani System (or basic nail care items- nail polish remover, cotton balls, Q-tips, nail clippers, file, etc.)
- Design stick/dotting tool
- Wood stick
- Small container (I used a Rubbermaid salad dressing container)
- Water
- White nail polish
- Multiple colored nail polishes
- Paper towels
- Tape, Elmer’s glue, etc. (to keep your skin from getting polish on it- optional)
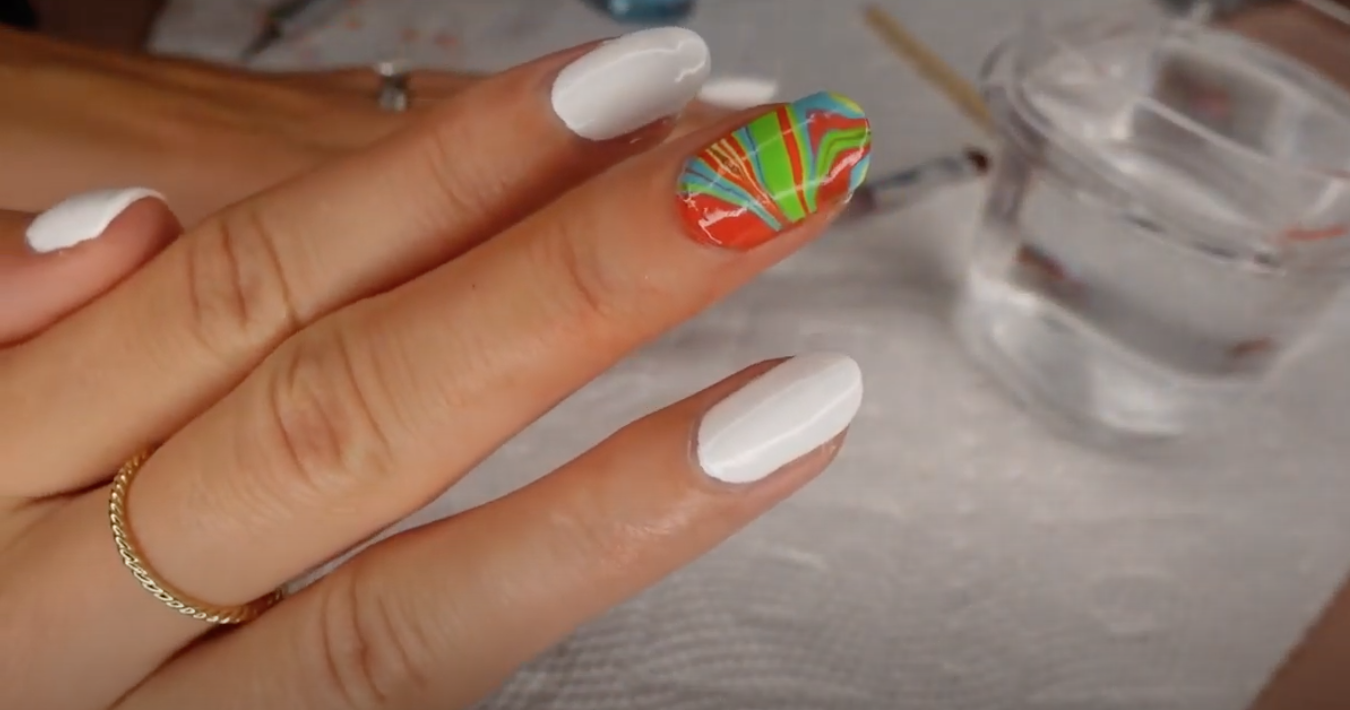
I used the following Olive & June products: Nail Primer (optional), Ridge Filler (optional), Dry Drops (optional). In the video above, I used the following Olive & June colors: HD (white), Lime Fizz (green), Megababe Blue, and Lava (coral red/orange).
Step 1 – Prep Your Nails
I wanted my mani to last and look good, so before I jumped into the design, I took some time to shape my nails and clean up my cuticles. To do this, I used my absolute favorite at-home mani system, Olive & June. While certainly not a requirement to water marble, it really makes mani-ing fun and stay on way longer. So if you’re looking to save some money on your nails or are tired of them messing up at the nail salon, check them out. If you’re buying a mani or pedi system, you can use my code savana20 for 20% off.
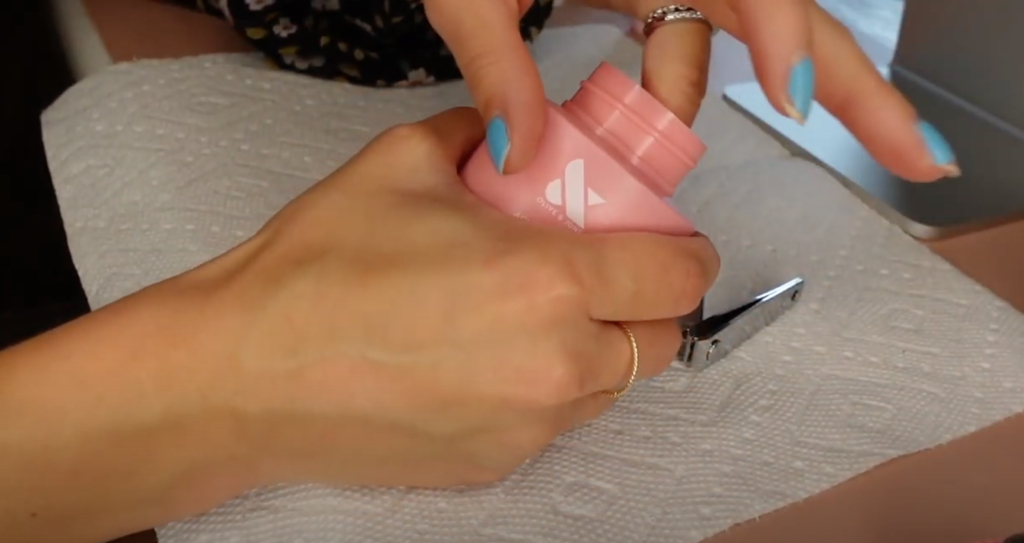
To be clear, this is the step where you would clip and file your nails, take off your old polish, buff, push back your cuticles, and apply any nail primer/strengthener/ridge filler.
Step 2 – Paint a White Base Coat
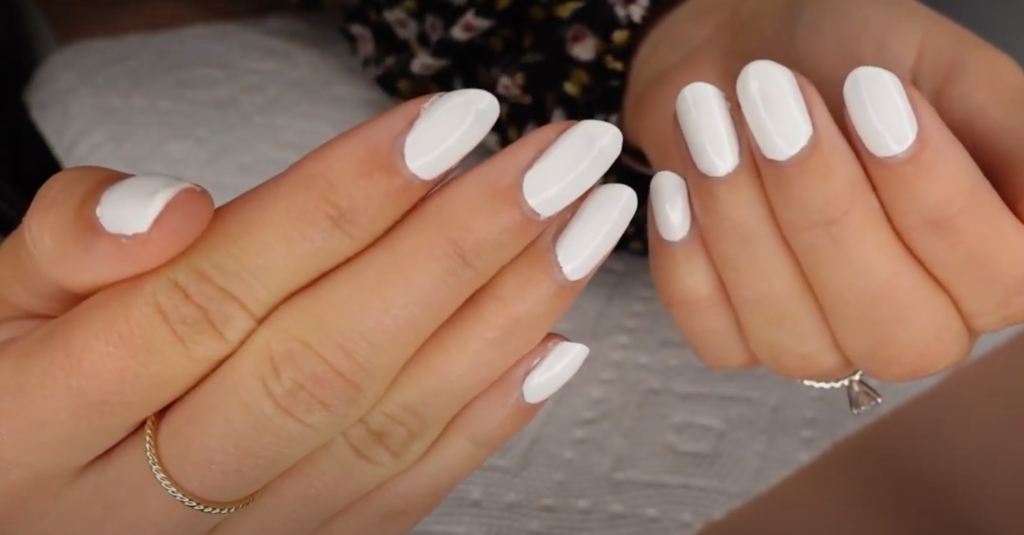
This step is technically optional. The main purpose is that for any place where polish doesn’t go on your nail, white would show through rather than just your nail. However, if a more bare mani look is what you’re going for, this will work just the same without it! If you’re using this option though, maybe consider a base coat if you’re using darker colors to protect your natural nail from yellowing. Another perk of a white base coat is it usually makes your mani brighter!
Step 3 – Prep Your Station
This is the last step before actually water marbling, yay! Fill your little container with room temperature water. Make sure it’s big enough that you won’t hit your nail off the side. As previously mentioned, a salad dressing container is the perfect size. Make sure everything from the “what you will need” section is nearby and loosen the caps on your water marble polish colors.
Step 4 – Drop the Polish Onto the Surface of the Water
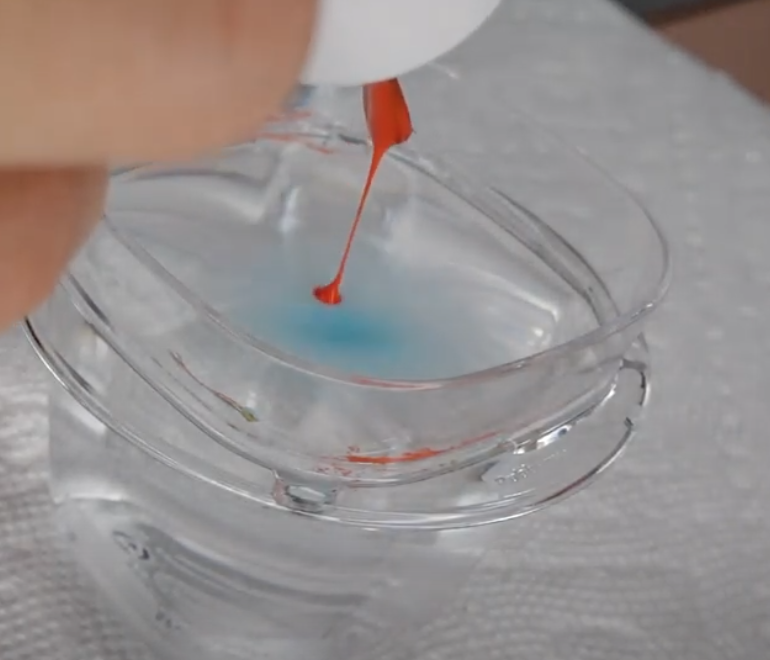
Next, you want to alternate dropping one color at a time into the water. Take your polish brush and, about an inch from the water, let one drop of polish fall in. The polish should spread out into a more transparent layer on top of the surface of the water. If it doesn’t, you can give your container a little shake.
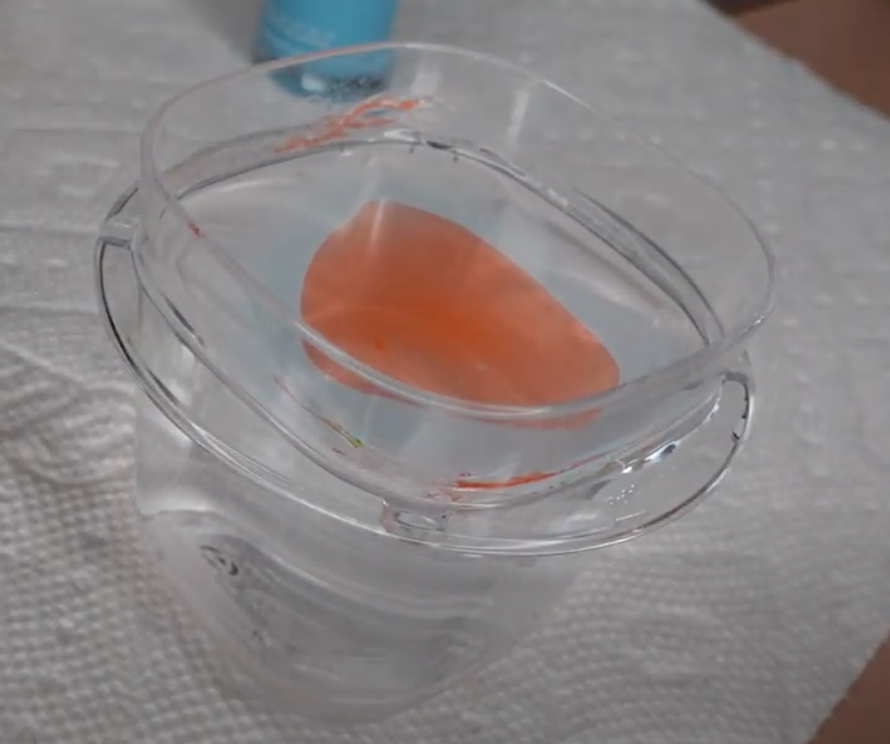
Be careful not to drop the polish too close to the water or it will sink. Repeat this step for each color (ex. pink, purple, yellow, pink, purple, yellow) until you are happy with the number and color of rings in the water.
Step 5 – Make Your Design
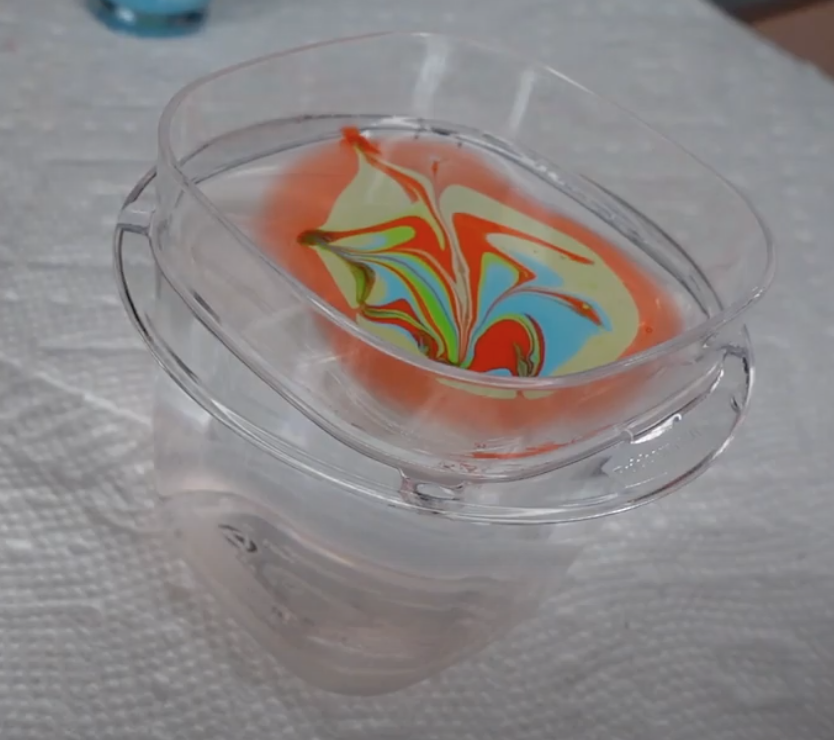
Now that all of your polish is spread out into little rings, you want to take your design stick/dotting tool and make designs in the water. Start from the inside and work towards the outer edge, not vice versa. you have to be pretty quick about this so the polish doesn’t dry.
Step 6 – Dip Your Finger
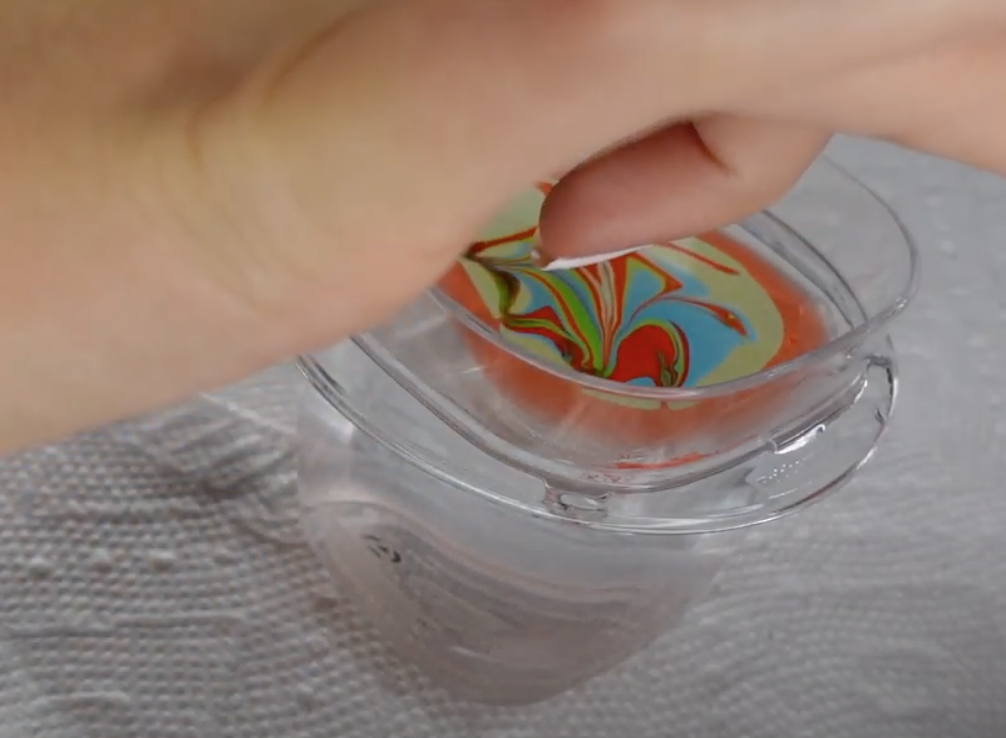
Next, find a spot in the design that you like and dip your finger nail down into the water. The idea here is to transpose the design onto your nail. Make sure not to hit your nail on the side or bottom of the container. If you have the room and really like the design you made, you can dip more than one nail at a time. LEAVE YOUR NAIL(S) IN THE WATER.
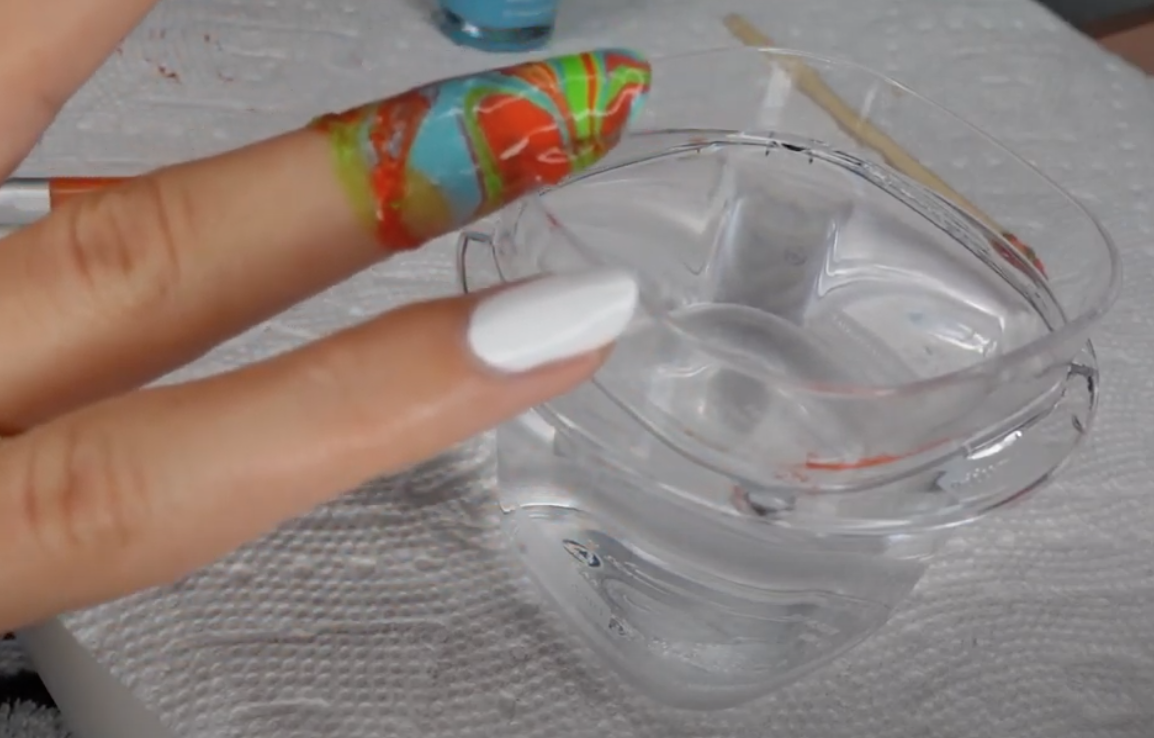
Step 7 – Remove Your Nail
Blow on the water to dry the surface polish. Use your wood stick to collect up all the polish. around your finger. This will swirl right onto the stick like cotton candy. Once the water is clean, pull your nail straight out and admire your gorgeous design. You did that girl!!!
Step 8 – Clean Up the Skin Around Your Nail
If you’ve followed my steps up until this point, you will have polish all over the part of your finger that you dipped into the water. If you have the Olive & June Mani System, use the sponge on the lid of the nail polish remover pot to clean up the majority of the polish then take the clean up brush and use it to get that clean, precise look around your cuticles. If you don’t have the mani kit, fear not, just use normal nail polish remover and Q-tips/cotton balls.

If you want to prevent having to clean up your skin, you can apply tape or some kind of barrier like Elmer’s glue that you can peel off. I personally prefer the #yolo method as I find these steps are more time consuming and aren’t 100% effective anyways.
Step 9 – Repeat
Repeat steps 4-8 for the rest of the nails that you plan to water marble. I like to switch up my design each time so my nails all have their own unique twist.
Step 10 – Apply Finishing Touches
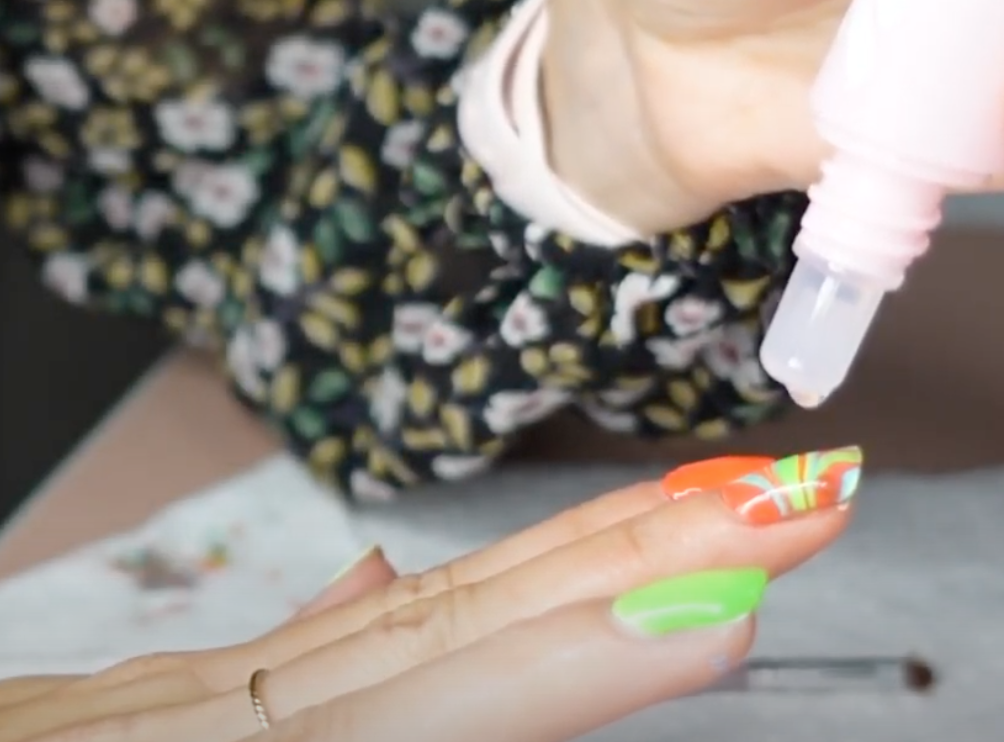
Now that your nails are gorgeous, you want to protect them and give them a nice glossy coat. Make sure they have dried for at least five minutes, then apply your top coat. I always apply Dry Drops after my manis because they make your nails dry to the touch in 80 seconds and I’m notorious for not sitting still long enough for my polish to dry on it’s own!
Have you ever water marbled or do you plan to? How did it go? What questions do you have?! Ask away in the comments below and tag me in your mani pics on Insta @withlovesavana 🙂